Well it appears I survived Blizzardpallooza 2011. Now it's just soooo cold! So it was kind of nice not having to worry about driving to work, since I was off this week, but it was also pretty lonely being stuck at home alone. So I did accomplish one of the tasks I planned, which was to turn my ugly formica counters into a thing of beauty. My friend Kristin showed me this stuff that she bought last week. Me, always trying to emulate everything she does, immediately went out and bought some for myself.
This is the stuff. Giani Granite Paint. It comes in many colors. I picked chocolate brown.
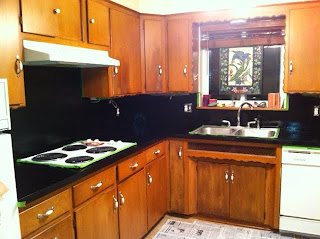
This is my kitchen. Very boring counters!
So on the eve of the Big Storm, I got an SOS pad and scrubbed down every inch of my counters and backsplash. The real task was getting all that blue residue from the pad off the counters. Then I had to use Frogtape to mask off the edges. This was the least fun and most time consuming part.
So after that was all done, I primed the counters with this black primer that came with the kit. (By the way, everything you need comes in the box which is great! Except I did buy an extra plastic paint tray and foam brush because I hate cleaning paint off things like this.)
About the time I got the primer on, the storm hit. So I went to bed and let all this dry overnight. The next morning was interesting because not only did I have a foot of snow outside, but I also really couldn't use my kitchen. Very poor planning on my part. My microwave and coffee maker are sitting on my kitchen floor and let's face it, I'm getting old and it's not much fun bending and stooping for that morning cup of Joe!
Since there was nothing on TV but constant news broadcasts about the snow, I started step 2 of the painting. It was fun! There are 3 colors that you sponge on the counters. At first I was wondering what I got myself into. It didn't look anything like granite! But strangely enough, as I sponged on colors #2 and #3, it was like magic! I let that dry 4 hours and then did 2 coats of clear topcoat. My counters are pretty much finished but I have to let them "set" for 3 days before I can put anything back on them. Here they are:
And a close-up:
I think it turned out really nice, don't you?
One thing I will say is that I accidentally applied the colors in the wrong order so they didn't turn out as "chocolate brown" as I originally wanted, but in the end I think this turned out better because it matches my wall color and my porcelain tile floor better.
Now my mom wants to do hers, and it was so fun I'm thinking about helping! Honestly, for about $70, this stuff can't be beat. I wish I had learned about this sooner!
Thanks, Kristin!!! You're the best!


